TL;DR
- Write a Character DNA document locking face, hair, costume, and accessories before you generate a single scene image.
- Generate and approve a master turnaround showing front, three-quarter, and profile views, then use it as the visual contract for every generation that follows.
- Match the method to the project: reference-image workflows for short sets, multi-reference editing for complex designs, LoRAs and ComfyUI pipelines for recurring client characters.
- Structure every prompt as an identity block first and a scene block second so character details take priority over scene language in model weighting.
- Run a seven-point QA scorecard on each output before delivery and inpaint or regenerate anything that fails two or more criteria.
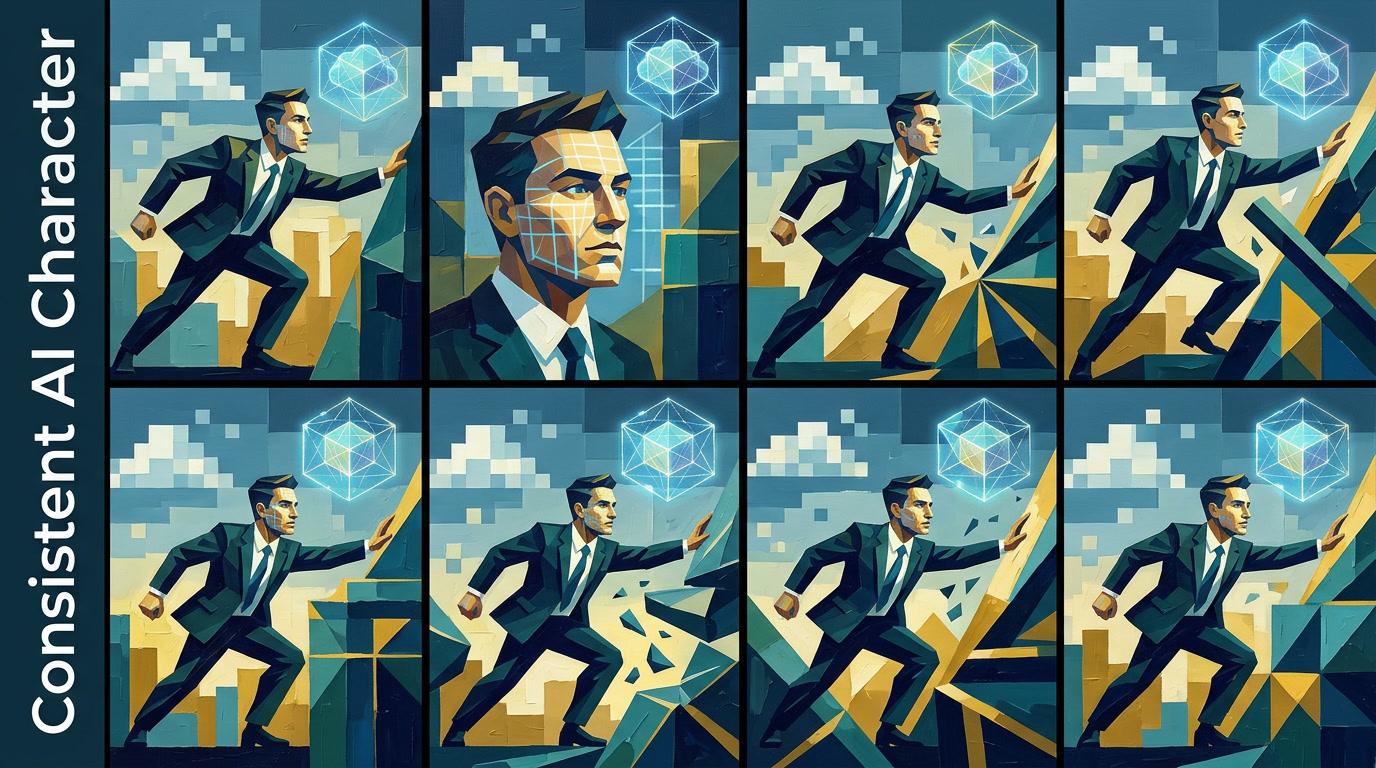
Keeping a consistent AI character across multiple images is the production problem that derails more illustration and branding projects than almost any other. A character looks right in image one, subtly wrong in image three, and barely recognizable by image ten. This guide builds a model-agnostic workflow that locks identity before the first scene prompt is written.
What Does ‘Consistent AI Character’ Mean in Practice?
A consistent AI character is one a viewer instantly recognizes across different scenes, poses, angles, and lighting conditions, based on shared structural traits: the same face geometry, hairstyle, costume silhouette, color palette, and signature accessories. You cannot achieve pixel-identical duplication across separate AI generations with any current workflow, and chasing it wastes your regeneration budget on the wrong problem.
Character drift is the gradual deviation of a character’s appearance across a series of images. Character drift almost always has one of three root causes: identity traits left vague in the prompt, absent or mismatched reference images, or switching generation models mid-project. Each cause has a targeted fix, which is why diagnosing drift correctly saves more time than re-prompting at random.
As nodetool.ai notes, the strongest production baseline is pairing a reference image with a short, explicit descriptor of stable traits and attaching both to every generation request. The reference provides visual grounding; the descriptor prevents the model from drifting when a strong scene instruction overrides a reference image signal on its own.
How Do You Build a Character DNA Document Before Prompting?
A Character DNA document is a written, locked file that defines every identity-critical trait before you generate anything. It separates the traits that must never change from the scene details that will vary image by image, and it travels with every prompt for the life of the project.
Start with a visual development pass, not a prompt. Sketch the character, assemble reference imagery, or run a quick exploratory generation to settle the design before codifying it. Once the design is approved, write a plain-text Character DNA document covering:
- Face: jaw shape, eye color and shape, brow weight, skin tone in descriptive words
- Hair: length, texture, color, parting direction, recurring details such as a streak, undercut, or braid
- Body: build, posture notes, approximate proportions
- Signature costume: garment names, fabric textures, color names, closures, any visible branding or motifs
- Accessories: glasses, jewelry, tattoos, scars, carried items
- Forbidden changes: an explicit list of traits that may never be altered, such as “always wears silver hoop earrings, never remove”
Once the Character DNA document exists, diyai.io recommends generating a character sheet with explicit front, three-quarter, and profile views before any scene work starts. Approve this turnaround and treat it as the visual contract: any generation that deviates from it goes back for inpainting or regeneration rather than shipping as a near-match. The forbidden-changes field matters as much as the descriptive fields because without it, models quietly drop earrings, simplify rings, and smooth over tattoos across a long series.
Which Consistency Method Fits Your Project Scale?
Three methods handle AI character consistency for graphic designers, and project scale determines which to use. Reference-image workflows suit short image sets of 3 to 10 images. Multi-reference editing fits complex character designs that need multiple visual anchor points. LoRAs and ComfyUI serve characters that will appear across many client deliverables over time. Choosing the right method at the start avoids switching costs mid-project.
| Method | Best project size | Key capability 1 | Key capability 2 | Technical level | Training required |
|---|---|---|---|---|---|
| Reference-image workflow | 3-10 images | Visual anchoring via uploaded reference portrait | Runs in browser-based tools with no pipeline setup | Low | No |
| Multi-reference editing | 5-20 images | Blends multiple reference images in one generation request | Locks face and costume from different angles simultaneously | Moderate | No |
| LoRA + ComfyUI | 20+ images / recurring | Small adapter steers every output toward a trained identity | Adjustable LoRA strength per generation in a node-based pipeline | High | Yes (15-40 curated images) |
Reference-image workflow. Upload your approved turnaround portrait to a model that accepts image conditioning. Tools including FLUX Kontext Multi, Ideogram Character, and Seedream 4.5 Edit all support image anchoring, using the uploaded face and costume as a visual guide rather than relying on text alone. This method requires no training time, runs in most browser-based tools, and handles campaign shoots, spot illustrations, and social-media sets without a complex setup.
Multi-reference editing. When a character has layered clothing, non-human features, or unusual color combinations, one reference image often fails to capture all identity-critical angles. Qwen-Image’s multi-reference editing mode, described by useaitools.me, accepts multiple reference images simultaneously. You can anchor the face from a portrait crop and the costume from a full-body reference in a single request, reducing the costume drift that typically appears when the character moves into a dynamic action pose.
LoRA and ComfyUI. For a character that appears across a long client campaign, storyboard series, or illustrated universe, training a character LoRA (Low-Rank Adaptation) justifies the setup cost. You train a LoRA on the character’s approved images and load it into Stable Diffusion or a ComfyUI node pipeline to steer every output toward that specific identity. Bottlerocketcontent.com suggests a training set of roughly 15 to 40 curated images, varied in angle, lighting, and expression but all consistent with the approved turnaround. ComfyUI’s node structure also lets you apply the LoRA at variable strength per output, which is useful when unusual lighting or extreme camera angles compete with the trained identity signal.
Key Takeaways
- Drift most often appears first in hairstyle, then in accessories, then in costume details. QA those three areas before anything else in every output review.
- Models with image conditioning, including FLUX Kontext Multi, Ideogram Character, and Seedream 4.5 Edit, tend to outperform text-only prompts for face consistency in short image sets.
- A LoRA can be applied at variable strength inside a ComfyUI node pipeline, giving you fine control when strong scene lighting or extreme angles compete with the trained identity.
- The “forbidden changes” field in your Character DNA document is as important as the descriptive fields. Accessories that the model drops quietly, earrings, rings, and carried items, need an explicit “never remove” instruction to survive a long project.
- Inpainting a masked face region with a portrait crop from the approved turnaround typically recovers identity faster than discarding and regenerating the full image when the composition is otherwise correct.
How Do You Structure Prompts to Lock Character Identity While Freeing the Scene?
Split every generation prompt into two sequential blocks: a locked identity block at the front and an editable scene block after it. AI image models weight prompt terms partly by position, so placing identity details first gives them priority over scene language. The scene block describes only what changes per image: environment, action, lighting direction, camera distance, and time of day.
A locked identity block for a stylized character might look like this:
Character identity block (paste verbatim at the start of every prompt):

Young woman, early 30s, oval face, wide-set almond-shaped brown eyes,
heavy straight brows, medium skin with warm undertones,
short black hair with a blunt fringe cut above the brows,
slim athletic build, upright posture.
Wearing: oversized sage-green cargo jacket with four front pockets,
white cropped tee, straight dark-wash jeans, white low-top sneakers.
Always wearing: small silver hoop earrings, thin silver ring on left index finger.
Never change: earrings, ring, jacket style, fringe cut.

---SCENE---
[Place environment, action, lighting, and camera instructions here]
Keep the scene block shorter than the identity block when consistency is the priority. If your scene description is three times longer than the identity block, you’ll see more face and costume drift in complex generations, because scene language competes with identity language for model attention in the later tokens.
When working with multi-reference tools such as Qwen-Image, the uploaded references carry more of the visual load, so the identity block can be slightly shorter. For single-reference models, the identity block needs to be more detailed to compensate for what one portrait crop cannot convey, such as back-of-hairstyle details or costume features hidden from a front-facing angle.


How Do You Catch Character Drift Before It Reaches a Client?
Running a seven-point QA scorecard against the approved turnaround before every delivery is the most reliable way to catch character drift. Compare each generated image on seven specific traits: face structure, hairstyle, eye color, costume silhouette, accessories, skin tone, and left-right accuracy. Any output that fails two or more criteria goes back for inpainting or full regeneration, not to the client.
In common practitioner experience, hairstyle tends to degrade first, as models often simplify complex cuts under strong scene instructions. Accessories fail next, with earrings disappearing and glasses frames shifting style between generations. Costume details collapse last, with closures, motifs, and layering flattening under complex background compositions. Knowing this order lets you check the most vulnerable traits first and spot a problem in seconds rather than doing a full visual review every time.
When face drift occurs and the composition is otherwise correct, inpaint the masked face region using a portrait crop from the approved turnaround as the inpaint reference image. Full regeneration is a better choice when the pose or composition itself is wrong. If three or more consecutive regenerations still produce face drift, your reference image is likely too small, too low-resolution, or cropped too tightly. Replacing it with a cleaner full-face crop at a higher resolution tends to resolve persistent drift before you spend additional generation credits on a workflow that cannot succeed with a weak input image.
Frequently Asked Questions
What is the best way to make a consistent AI character across multiple images?
The most reliable production approach combines three elements in every generation: a written Character DNA document locking every identity-critical trait, an approved master turnaround used as the reference image, and a split prompt structure with the identity block placed first. Using all three gives the model both visual and textual anchoring. Using only one, particularly a prompt without any reference image, produces noticeably more drift as the number of images in the set grows. Promptus.ai’s comparative test of prompt-only, reference-image, and LoRA methods found that reference-image approaches consistently outperformed text-only prompting for face match across different scenes, while LoRA performance depended heavily on training image quality.
Should I use one reference image or a full character sheet?
A full character sheet, showing front, three-quarter, and profile views, gives the model more identity information than a single portrait, particularly for characters with distinctive hair from the back or asymmetrical costume details visible only from the side. For quick one-off projects, a single high-quality portrait will do. For campaigns or serialized work, generate and approve the full turnaround before any scene work starts, then upload whichever panel is most relevant for each scene type. Portrait crops anchor faces most reliably; full-body views anchor costume silhouettes more accurately when you display the character at a distance.
Which character details should stay locked in every prompt?
Lock everything that makes the character identifiable at a glance: specific face geometry terms such as jaw shape, eye shape and color, and brow weight; hairstyle including cut, texture, and parting direction; any asymmetrical features or markings; the full costume with garment names and color names; and every accessory. The forbidden-changes field is especially important for small accessories that models drop without warning, including earrings, rings, brooches, and carried objects. Scene-safe variables you can change freely include background, lighting direction, weather, camera angle, pose, and expression.
How do I change the background without changing the character?
Confine background and environment instructions to the scene block at the end of the prompt and keep that block shorter than the identity block. If the character still shifts with a new background, the scene instruction is competing with identity text for model attention. Try reducing the scene description to fewer, more specific words. If drift continues, switch to a two-pass approach: generate the character against a plain or transparent background first using only the identity block, then composite or inpaint the background in a second pass. This separates scene complexity from character generation and gives the model a clean anchor for the character before any environment is introduced.
What should I do when the AI changes the character’s face?
Face drift typically has four causes to address in order. First, check whether the reference image is at least 1024 pixels on the face crop; a small or heavily compressed portrait gives the model a weak visual signal. Second, check whether the scene prompt is long enough to push identity terms out of the model’s attention window; shorten the scene block. Third, confirm you are using the same model version you used to design the character, as switching models mid-project is a common and easily overlooked cause of face changes. Fourth, if the pose and composition are correct but the face alone is wrong, use face inpainting with the approved portrait as the inpaint reference rather than discarding and regenerating the full image, which loses a correctly composed frame unnecessarily.
To start applying this workflow today, open a plain text file, write your Character DNA document for the character you are currently working on, generate a front-and-profile turnaround in your preferred tool, and save both to a dedicated project folder before writing a single scene prompt. That setup pass, done once, is what separates a project that holds together from one that drifts across every delivery.