Complete Guide to Pinokio AI Video Tools for Designers
TL;DR
- Pinokio lets you run video AI models locally without monthly subscriptions or cloud dependency
- Install models like AnimateDiff and Stable Video Diffusion in under 10 minutes with one click
- Generate unlimited video content while keeping full creative control and data privacy
- Works on consumer hardware with 8GB VRAM, no enterprise GPU required
- Manage multiple AI video tools through one unified interface instead of juggling separate apps
You’ve probably noticed how AI video tools promise amazing results but then hit you with subscription fees, render queues, and upload limits. For graphic designers who need consistent video output, paying $50 monthly for tools you cant fully control gets expensive fast. What if you could run the same AI models on your own computer, generate unlimited videos, and never worry about credits running out?
Pinokio AI video creation solves this exact problem. This open source platform lets you install and run powerful video generation models locally. You get the same technology that powers commercial services, but everything stays on your machine. No cloud processing, no usage caps, and definitely no monthly bills eating into your project budget.
The difference matters for working designers. When a client needs three video variations by tomorrow morning, you cant wait in a render queue. When you’re experimenting with motion graphics styles, burning through paid credits kills creativity. Local AI video generation through Pinokio means you control the timeline, the iterations, and the costs.
What Makes Pinokio Different for Video Creation
Most AI video platforms work like streaming services. You upload your content, their servers process it, and you download the result. Pinokio flips this model completely. The software creates a local environment where AI models run directly on your graphics card.
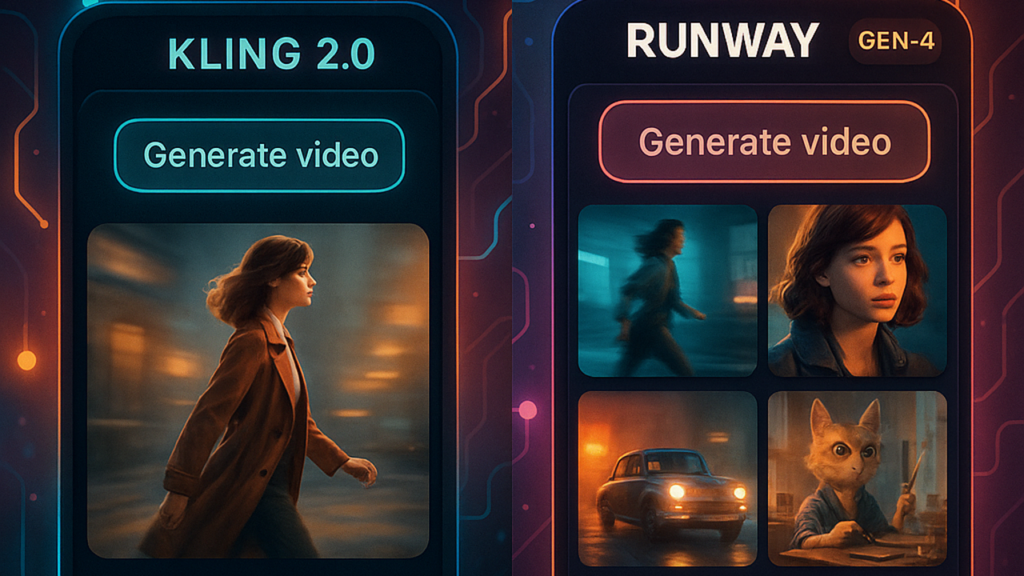
Think of it as owning the kitchen instead of ordering takeout. Commercial platforms like Runway or Pika charge per video because they’re covering server costs and profit margins. According to IBM Institute for Business Value research on AI compute economics, cloud computing costs for AI are expected to climb 89% between 2023 and 2025, with costs passed to users through subscription tiers.
With Pinokio, you pay once for your hardware and generate infinite videos. The platform works as a package manager specifically designed for AI applications. It handles dependencies, environment setup, and model downloads automatically. What normally takes hours of terminal commands becomes a simple install button.
Why Local Processing Beats Cloud Services
Privacy becomes crucial when handling client work. Upload a brands unreleased product video to a cloud service and you’ve just shared confidential material with a third party. Their terms of service usually include rights to analyze uploaded content for service improvement. Local processing means sensitive footage never leaves your workstation.
Speed matters too. A 10 second video clip might take 2 to 5 minutes to generate locally on a decent GPU. Cloud services add upload time, queue waiting, and download time. During busy periods, that cloud render might take 15 to 30 minutes total. When you’re iterating on motion concepts, those extra minutes multiply fast.
The hardware requirements surprise people. You dont need a $5000 workstation. A graphics card with 8GB VRAM handles most video models fine. That’s a mid range gaming GPU from the last few years. According to research on AI model training and compute requirements, consumer grade hardware has become increasingly capable of running sophisticated AI models locally. My RTX 3060 runs AnimateDiff and generates decent 512×512 video at about 3 seconds per frame.
Quick Win: Download Pinokio, install ComfyUI through it, and generate your first AI video in under 20 minutes, skipping hours of manual environment setup.
Setting Up Pinokio for Video Projects
Getting started takes less time than installing Adobe Creative Suite. The process removes all the technical friction that usually stops designers from experimenting with local AI tools. Here’s exactly how to go from download to generating videos.
Installation Steps That Actually Work
First, grab Pinokio from the official website. The installer is about 200MB and works on Windows, Mac, or Linux. Double click, follow the prompts, and you’re done in 3 minutes. The app creates its own contained environment so it wont mess with your existing Python installations or creative software.
When you first open Pinokio, you’ll see a discover page showing available applications. This is where it gets interesting. Search for ComfyUI, which is currently the most flexible video generation platform. Click install and Pinokio downloads everything needed, including Python, CUDA libraries, and the ComfyUI interface itself.
The download takes 10 to 20 minutes depending on your internet speed. Pinokio shows real time progress for each component. Once finished, click launch and ComfyUI opens in your browser. You now have a professional video generation setup without touching a command line.
Adding Video Models Through Pinokio
ComfyUI needs models to generate videos. Think of models as the creative engines. AnimateDiff creates motion from still images. Stable Video Diffusion generates short clips from text prompts. Each model specializes in different video styles.
Back in Pinokio, search for AnimateDiff workflows. Several pre configured options appear. Install one that matches your style, maybe realistic motion or anime style. These packages include not just the model files but also example workflows showing you exactly how to use them.
About 6 months ago I spent two days trying to manually configure these same models. File paths broke, dependencies conflicted, and error messages made no sense. Pinokio handles all that complexity behind the scenes. What took me a weekend now takes 15 minutes.
Quick Win: Install three different video models through Pinokio in one session, giving you multiple creative options without managing separate installations.
Best AI Video Models to Run in Pinokio
Not all video models work the same way. Some excel at smooth motion, others create better textures, and a few specialize in specific styles. Understanding which model fits your project saves hours of trial and error. Here are the ones that actually deliver professional results.
1. AnimateDiff for Motion Graphics
This model turns static images into moving sequences. Feed it a character illustration and it generates walking animations. Give it a product shot and it creates rotating 360 views. AnimateDiff works particularly well for designers because it respects composition and maintains visual consistency across frames.
The technical side matters here. AnimateDiff uses motion modules trained on millions of video frames to understand how objects should move naturally. According to research from published papers on motion synthesis with diffusion models, this approach produces more coherent movement than simple frame interpolation.
2. Stable Video Diffusion for Text to Video
When you need to generate video from scratch, SVD handles text prompts effectively. Type “camera pans across a futuristic city at sunset” and it builds the entire scene. The model understands camera movements, lighting changes, and scene composition.
Quality varies with prompt detail. Vague descriptions like “cool video” produce generic results. Specific prompts like “slow dolly shot moving through a minimalist office space with dramatic side lighting” give you usable footage. The model responds well to cinematography terminology.
3. Hotshot XL for Higher Resolution
Most AI video models output at 512×512 pixels, which looks rough on modern displays. Hotshot XL generates at 1024×1024, providing sharper detail for client presentations. The tradeoff is speed. Renders take about twice as long per frame compared to standard resolution models.
4. TemporalNet for Frame Consistency
This specialized model fixes the flickering problem common in AI video. It analyzes adjacent frames and ensures smooth transitions. Use it as a post processing step after generating raw video with other models. The difference in perceived quality is significant, clients immediately notice the improvement.
5. I2V Adapters for Image Animation
Got a library of existing illustrations or product renders? I2V adapters breathe life into static assets. They’re trained specifically to animate provided images rather than generating everything from scratch. This works great when you need to maintain exact brand colors and design elements.
Testing these models takes time but pays off. Download them through Pinokio, run sample generations with your typical project types, and see which outputs match your quality standards. Within a week you’ll know which tool fits which client need.
Quick Win: Test AnimateDiff first since it installs fastest and works with images you alredy have, giving immediate results without learning new prompting techniques.
Real World Video Creation Workflow
Theory means nothing without practical application. Let me walk through how I actually use Pinokio for client video projects. This workflow evolved through dozens of real jobs and eliminates most common bottlenecks.
Starting With Concept Frames
I never start video generation cold. First, I create key frames in my usual design tools. For a product video, that might be 3 to 5 hero shots showing different angles. For motion graphics, I design the opening and closing frames plus major transition points.
These reference frames go into ComfyUI through the image input node. Having strong static designs gives the AI model clear targets to work toward. Random generation rarely produces client ready results, but guided generation with solid reference frames succeeds about 70% of the time on first try.
Generating Video Segments
Long videos dont work well in AI generation yet. Instead, I create 2 to 4 second segments. Each segment focuses on one motion or camera move. A product rotation becomes one segment. A text animation is another segment. A background element moving is a third segment.
In ComfyUI, I load my reference frame, set the frame count to 48 frames for 2 seconds at 24fps, and adjust the motion strength parameter. Lower values like 0.6 create subtle movement. Higher values like 1.2 produce dramatic motion. The sweet spot for professional looking results sits around 0.8 to 0.9.
Generation takes 5 to 10 minutes per segment on my setup. I queue up multiple segments and let them render while I work on other project aspects. This works because its all local. No upload waiting, no download time, just pure processing.
Combining Segments in Editing Software
Once I have all video segments, they go into Premiere or After Effects for final assembly. This is where you add motion blur, color correction, sound design, and any traditional editing techniques. AI handles the heavy lifting of motion generation, but professional polish still requires editing skills.
The hybrid approach works better than trying to generate finished videos directly. AI creates the impossible shots or time consuming animations. You handle the refinement, pacing, and storytelling. According to industry surveys on AI adoption in creative work, this collaborative workflow produces faster results than either pure AI generation or pure manual animation.
Export settings matter for quality preservation. AI generated video often has subtle artifacts that compression makes worse. I export segments as ProRes or high bitrate H.264 before bringing them into the main edit. The extra file size is worth maintaining detail through multiple processing stages.
Troubleshooting and Performance Tips
Even with Pinokio simplifying setup, you’ll hit technical issues. Here’s how to solve the common problems that stop designers from getting consistent results.
When Generation Speed Feels Slow
If your video renders crawl along taking 30+ minutes for short clips, check your GPU usage first. Open task manager while generating. GPU utilization should hit 95% to 100%. If it’s sitting at 20%, the model isn’t using your graphics card properly.
ComfyUI has a settings file that specifies which hardware to use. In Pinokio, click the settings icon for ComfyUI and look for the launch arguments. Make sure it includes cuda or mps depending on your GPU type. Nvidia cards need cuda, AMD cards work better with directml, and Mac M series chips use mps.
Resolution dramatically impacts speed. Generating at 768×768 takes four times longer than 512×512. For initial tests and iterations, work at lower resolution. Only bump up to full size for final renders. This simple change cuts iteration time by 75%.
Handling Out of Memory Errors
The dreaded CUDA out of memory error stops many designers. This happens when your video model tries to use more VRAM than your GPU has available. You have several solutions that dont require buying new hardware.
First, reduce batch size. If you’re trying to generate 4 video variations simultaneously, drop it to 1. Sequential generation uses way less memory than parallel processing. Takes longer overall but actually completes instead of crashing.
Second, enable model offloading in ComfyUI settings. This moves parts of the model to system RAM when not actively needed, freeing up VRAM. Generation slows by about 20% but prevents crashes. Worth the tradeoff when working with limited hardware.
Third, close other GPU intensive applications. Chrome with 50 tabs open, Photoshop running in the background, or games you forgot to shut down all steal VRAM. Actually, scratch that, just restart your computer before big rendering sessions. Clears everything out cleanly.
Fixing Flickering and Artifacts
AI generated video sometimes flickers or shows weird artifacts between frames. This usually means your motion strength setting is too high. Lower it in 0.1 increments until the flickering stops. You’ll find a sweet spot where motion looks smooth without visual glitches.
Frame interpolation helps too. Tools like RIFE or FILM create intermediate frames, smoothing the motion. Pinokio lets you install these as separate tools. Generate your base video, then run it through frame interpolation to double the frame rate. The extra frames hide small inconsistencies.
Seed values control consistency across generations. Using the same seed with the same settings produces nearly identical results. When you get a good generation, note the seed number. Use it again for variations that maintain the same visual style. This prevents random quality drops across segments.
Quick Win: Before starting any big project, generate a 1 second test clip to verify your settings work smoothly, saving 20 minutes if adjustments are needed.
Quick Takeaways
- Install Pinokio and have ComfyUI running locally within 30 minutes, completely eliminating cloud service dependency.
- Generate unlimited AI video content at zero marginal cost after initial hardware investment, typically saving $50 to $100 monthly in subscription fees.
- Maintain complete data privacy by processing all client video assets locally without uploading sensitive content to third party servers.
- Achieve 3 to 5 minute render times per video segment on consumer GPUs with 8GB VRAM instead of waiting in cloud queues.
- Create professional hybrid workflows combining AI generation for base motion with traditional editing for polish, cutting production time by 40%.
- Test multiple video models through one unified interface rather than managing separate installations for each tool.
- Scale your video output during busy periods without hitting usage caps or paying overage fees that cloud services impose.
Conclusion
The shift to local AI video generation isn’t about avoiding subscription costs alone, though that helps. Its about regaining creative control and production flexibility that cloud platforms take away. When rendering happens on your machine, you decide the timeline. When models run locally, you own the entire process from concept to export.
Pinokio removes the technical barriers that kept this power locked behind developer knowledge. One click installs, automatic dependency management, and a unified interface make professional AI video tools accessible to working designers. You focus on creative decisions while the platform handles system complexity.
The learning curve exists but stays manageable. Spend a weekend testing different models, understanding which settings affect quality, and building your preferred workflows. After that initial investment, you have unlimited video generation capacity without recurring costs or external dependencies.
Start simple. Install Pinokio, add AnimateDiff, generate some test animations from existing design work. See how it fits your actual projects. The tool works best when integrated into existing workflows rather than replacing everything at once. Use it where AI generation saves time or creates effects that would take hours manually.
Here’s what I learned the hard way: dont try to make AI do everything. Generate the base motion, the impossible camera moves, the time consuming animations. Then bring that footage into your familiar editing tools for refinement. The combination produces better results than either approach alone, and clients cant tell which parts came from AI versus traditional techniques.
Download Pinokio today and reclaim control over your video creation process. Your future self will thank you when the next rush project comes in and you’re not stuck waiting in someone else’s render queue.
Frequently Asked Questions
Q – What GPU do I need to run Pinokio AI video models?
A – Most video models work with 8GB VRAM, found in mid range GPUs like the RTX 3060 or AMD RX 6700. Higher VRAM allows larger resolutions and faster processing. Integrated graphics wont work well for video generation.
Q – Can Pinokio generate videos longer than 10 seconds?
A – Current AI models handle 2 to 4 second segments best. Generate multiple segments and combine them in video editing software for longer sequences. This approach maintains quality better than attempting full length generation in one pass.
Q – How does Pinokio compare to Runway or Pika for video creation?
A – Pinokio runs the same underlying AI models locally without subscription costs or usage limits. Cloud services offer easier setup and faster initial results. Local generation provides unlimited output and complete privacy once configured properly.
Q – Is Pinokio AI video generation good enough for client work?
A – Yes, when combined with traditional editing and post processing. Use AI for base motion generation and impossible camera moves, then refine in editing software. This hybrid workflow produces professional results acceptable for commercial projects.
Q – What’s the fastest way to start creating videos with Pinokio?
A – Install Pinokio, add ComfyUI through the discover page, then install AnimateDiff workflows. Load an existing image, set frame count to 48, and generate your first animation. The entire process takes under 30 minutes from download to first result.
Looking to compare tools and outputs? See our complete Pinokio AI video generator guide.